Settings
Every setting in the Inspector, with what it does. The look
(style, colours, materials, lines, shading, cleanup) is in the Style
step, whose graph is the look as nodes (the Style graph); a
camera’s and a light’s settings show in the Scene step when you select
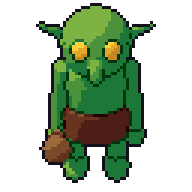
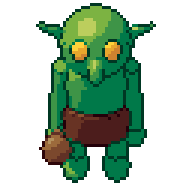
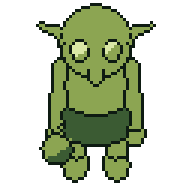
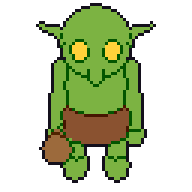
that camera or light (see The scene). The images are the
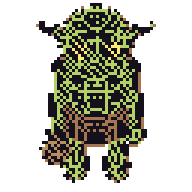
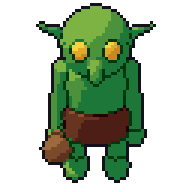
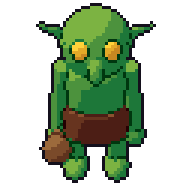
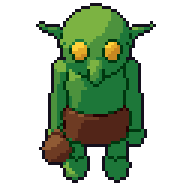
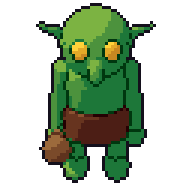
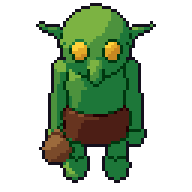
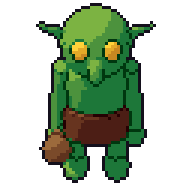
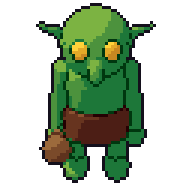
library’s goblin at 64 px, the clean preset with one setting changed (made by
scripts/docs_images.sh, so they match this version). An accent bar on
the left edge of a setting shows that you changed it from the preset;
right-click it to reset.
Style
Preset is the starting point. Projects store only what you change, so when a later version improves a preset, your projects improve with it.
| clean | selout | retro4 | flat | wireframe |
|---|---|---|---|---|
 |
 |
 |
 |
 |
Kits go one step further: Save kit… (Save the Style as a kit)
writes the Style shown — the whole look of a game: the preset and its
changes, the light rig, the camera, the pixels per metre and the palette
itself — into one small kit file (.pixorkit) in the library of pipelines,
which the node library lists under My pipelines. Use kit… (Use a Style kit) makes a
Style of this project’s from a kit and shows it, keeping the project’s own
clips, materials and exports, so every asset in the game matches.
Double-clicking or dropping a Style kit on Pixor with a project open does
the same. Kits carry their palette inside, so they work on any machine and can be shared. On the
command line: pxr style new game.pixorkit --from hero.pixor, then
pxr render model.glb --style game.pixorkit.
Match a sprite… reads the look off a sprite you already have — art
from your game, or a sprite you want to fit beside — and sets it: its
palette (its colours, exactly), its size (how tall it stands), its outline
(one dark colour all round, a darker shade of each colour, or none), its
light bands, how far its ramps turn in hue from dark to light, and whether
it dithers. The status line says what it read and why; every setting can
be changed after, and one undo takes it all back. On the command line,
pxr reference sprite.png says what it reads, and pxr project set game.pixor --match-sprite sprite.png sets it.
Console (None by default) holds the look to an old machine’s
rules: Game Boy, NES, PICO-8, TIC-80 or C64 (its colours, its colours per
sprite, the C64’s double-wide pixels). Under it Pixor says whether the
sprite fits. On the command line: --console gameboy.
Cameras
Select a camera in the Outliner (or click it in the 3D view) to see these. Each camera renders its own sheet (cameras framed together share one, a row each); Game sets one up for a kind of game in one click (see The scene).
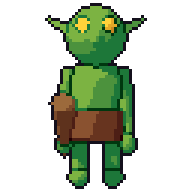
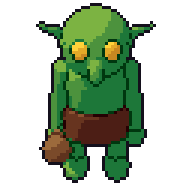
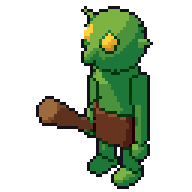
View sets the camera angle. A camera is one side of the sprite: more sides are more cameras, turned round the model.
| side | three-quarter | isometric | top-down |
|---|---|---|---|
 |
 |
 |
 |
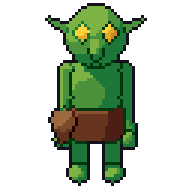
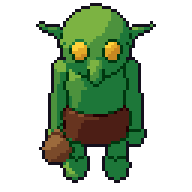
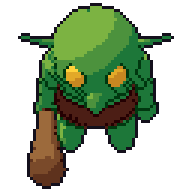
Pitch fine-tunes the angle (degrees below the horizon, -90° to 90°; negative looks up from below). Turn (-180° to 180°) turns the camera about the model: which side it sees. Dragging the camera in the 3D view sets both. Ring round the model adds 4, 8, 16 or 32 cameras like this one, a side each.
| 20° | 45° | 70° |
|---|---|---|
 |
 |
 |
Size says how a camera’s pixels are decided:
- Fitted to the model: Width and Height are the canvas the model (every frame of every exported clip, from every side) is fitted into, 4 to 2048 px each: 64 by 64 for a character, 960 by 540 for a title image.
- Canvas and zoom: Width and Height are the canvas, and Zoom how many pixels a metre becomes, each set on its own: a wider canvas shows more of the scene rather than drawing the model bigger, and what does not fit is cropped.
- Pixels per metre: a fixed scale all your characters can share (Pixels/m), the canvas growing to fit.
In the 3D view the camera’s frame is drawn in the accent colour, with its width and height in pixels written inside it and its zoom (pixels a metre, 18.3 px/m) by its top right corner. Drag a side’s handle to widen, narrow, heighten or shorten the canvas — its aspect changes with it — and drag a corner to zoom: out, the frame takes in more on the same canvas; in, less, drawn bigger. Either makes the camera Canvas and zoom.
Projection is Orthographic — every part the same size wherever it is,
as pixel art mostly is — or Perspective, where what is nearer is bigger,
with its Field of view (5° to 150°, 50° when you switch to it). Either
way the model’s feet keep the same pixels per metre.
(pxr project set game.pixor --fov 50, 0 for orthographic.)
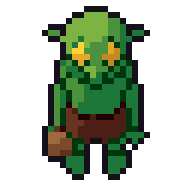
| 32 px (shown 2x) | 64 px |
|---|---|
 |
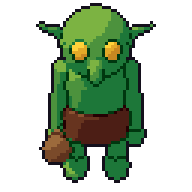 |
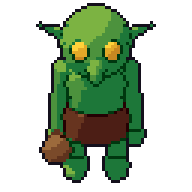
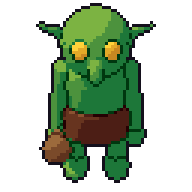
Samples (in the Style step, under Cleanup) is the supersampling per
axis, 1 to 8. More samples decide each pixel from more of the model:
cleaner shapes and thin parts, slower renders. On the command line:
--samples 2.
| 1 | 4 (default) |
|---|---|
 |
 |
Nudge X and Nudge Y (under Samples) move the model a fraction of a
pixel along the pixel grid, -0.5 to 0.5. The sprite keeps its size and its
pivot; only which points of the model become pixels changes. When one
detail will not land — an eye that falls between two pixels, a stair-step
on an edge that should be clean — a quarter of a pixel is often all it
takes. On the command line: --nudge 0.25,0.
Lights
Select the key, fill or rim light in the Outliner (or drag the key and fill lights in the 3D view).
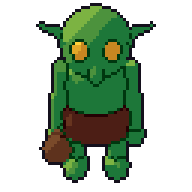
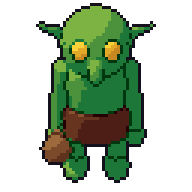
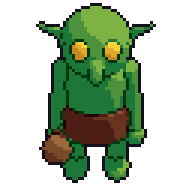
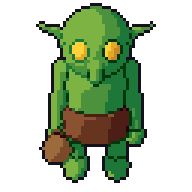
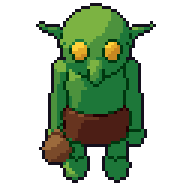
Azimuth (-180° to 180°) and Elevation (-90° to 90°) place the
key light. With Follows the
camera on (the default) they are measured from the camera, so the light
stays on the same side of every camera, as sprites usually want. Turn it
off and the light stays put in the scene: a character walking away from it
is darker (--light-space world on the command line).
| azimuth -90° | -45° (default) | 45° |
|---|---|---|
 |
 |
 |
| elevation 15° | 45° (default) | 80° |
|---|---|---|
 |
 |
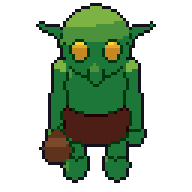 |
Light rig sets up the whole lighting at once, still on the palette’s ramps: Noon (sun high above), Dusk (low orange sun, violet fill on the shadow side, rim highlights), Torchlight (a warm flame low in front), Moonlight (cold light from above, faint blue fill, rim) and Studio (key, fill and rim, for icons and previews). A rig sets the key light, a fill light that lifts the shadow side by a band or two, rim highlights, and the hues that lights and shadows lean toward. Azimuth and elevation can still be changed after picking a rig.
The fill light’s Strength (0 to 1; 0 turns it off) lifts the shadow
side; Own angle gives it an azimuth and elevation of its own instead
of opposite the key (--fill 0.3 on the command line). The rim light
(On) adds a highlight on edges that turn away from you, on the lit side;
Width (0.3 to 0.95) sets how far in it reaches.
Cast shadows (on the key light) lets parts shade each other (the
shield on the body, the helmet on the shoulders). On the command line:
--no-shadow.
| on | off |
|---|---|
 |
 |
Colours
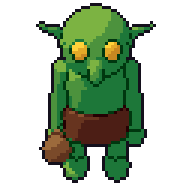
Base colours (1 to 32, automatic palettes only) is how many colours Pixor takes from the model’s textures. Each one gets its own ramp of lighter and darker shades.
| 3 | 10 (default) |
|---|---|
 |
 |
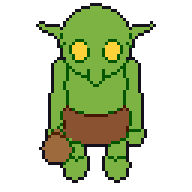
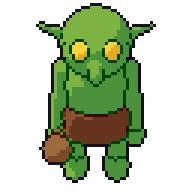
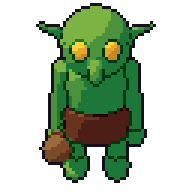
Light bands (1 to 4) is the number of lit shades per colour
(--bands 2).
| 1 | 2 | 3 (default) | 4 |
|---|---|---|---|
 |
 |
 |
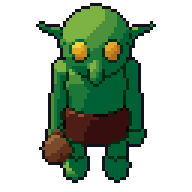 |
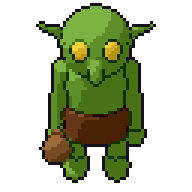
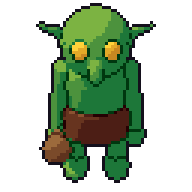
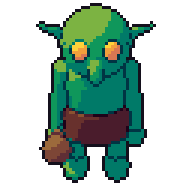
Hue shift (0° to 30°) turns shadows toward blue and lights toward yellow, as pixel artists do, instead of only darkening.
| 0° | 9° (default) | 25° |
|---|---|---|
 |
 |
 |
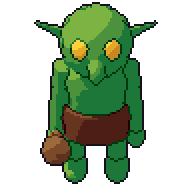
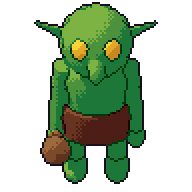
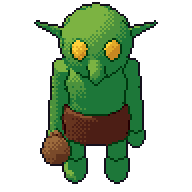
Dither mixes neighbouring shades in an ordered (Bayer) pattern where
one light band meets the next, instead of a hard step. The pattern is fixed
to the model’s surface: it is a clean pixel grid when the model stands
still and moves with each part as the model animates, instead of crawling
over it. Only two neighbouring shades of the same colour ever mix, and
cleanup leaves dithered pixels alone. It runs from 0 to 1 (--dither 0.5).
Shown at 96 px:
| 0 (default) | 0.5 | 1 |
|---|---|---|
 |
 |
 |
Dither pattern: Crosshatch (Bayer), the ordered grid above, or
Scattered (blue noise), pixels spread evenly with no grid the eye picks
out — the dither an artist places by hand. Both stay on the surface as the
model moves, so neither crawls. On the command line: --dither-pattern blue-noise.
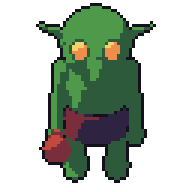
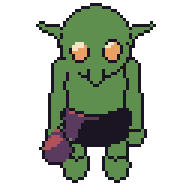
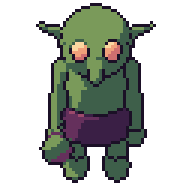
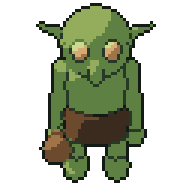
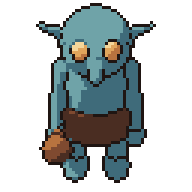
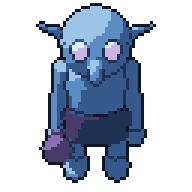
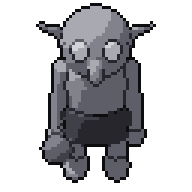
Palette is Auto (colours taken from the model), one of Pixor’s own palettes, or a file. The built-in ones are sets of ramps, dark to light, made for Pixor:
| pixor-16 | pixor-8 | dusk-12 | forest-12 |
|---|---|---|---|
 |
 |
 |
 |
| desert-12 | ice-10 | mono-8 |
|---|---|---|
 |
 |
 |
Palette file… uses your own palette (Lospec .hex, GIMP .gpl, or a
.png whose colours become the palette); the ramps snap to its colours.
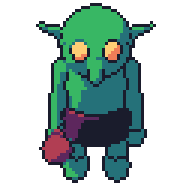
On the command line: --palette my.hex or --palette dusk-12. Here, an 8-colour palette:
Match colours in (with a palette of your own or a built-in one) decides
which of its colours counts as nearest when the ramps snap to it: OKLab,
as the eye judges and keeping light and dark apart (the default); sRGB,
the plain distance most tools use, which a palette made in one of them may
expect; or Weighted RGB, in between. Under it, the current frame matched
in each of the three, side by side: click one to choose it. On the command
line: --match-space srgb.
Materials
Every material of the model is listed here with what the look does to it. The settings belong to the material, not to one part, so they apply to every part made of it; selecting a part in the Scene step tells you which material that is.
From the model file takes what a glTF material says about its surface, beyond its colour, as a starting point for the look:
| What the file says | What Pixor does with it |
|---|---|
| metal, and roughness below fully rough | a harder, wider glint; a metal keeps single bright pixels, which read as a glint rather than as noise |
| a metallic-roughness map | the same, per pixel: a surface can be metal in some places and not in others |
| an occlusion map | a crevice goes one ramp step darker |
emissive (with KHR_materials_emissive_strength) |
the material glows: its brightest shade whatever the light. With an emissive map, only the pixels the map lights, so a lamp glows and its post does not |
KHR_materials_unlit |
the flat look: the base shade everywhere |
alpha BLEND, KHR_materials_transmission |
see-through, drawn as an ordered dither anchored to the surface, never as soft alpha; a BLEND texture with clear texels (a decal, an eye) is cut out where it is clear |
KHR_texture_transform |
honoured: the texture is offset, turned and scaled as the file asks |
| clearcoat, sheen, iridescence, volume | ignored, and pxr inspect says so rather than letting the surface come out quietly wrong |
| a normal map | read and reported, but not used: bending the normal needs a tangent, and the two ways to get one either add four floats to every vertex of every model or differ between GPUs |
Fully rough and not metal is the neutral case, because that is what glTF itself defaults to and what every exporter writes for a surface nobody thought about. The number of light bands stays yours: it is the Colours setting above, and the model does not override it.
The maps are sampled by a second pass over the geometry, which runs only when a material has one and this is on, so a model without maps costs nothing.
Turn this off to shade a material from its colour alone. On the command
line: --no-material-channels.
pxr inspect MODEL lists what each material asks for.
- lines: the 1-pixel lines around this material. Turn them off for glows, flames, water and glass, where a dark outline reads wrong.
- shades cycle: this material’s shades turn round a step per frame on the Colour cycle action (water, lava, runes, screens). The JSON export also lists the palette indices, for engines that cycle at run time.
- team colour: this material is the team colour. A team palette variant (Asset step, Add variant: team red, team blue, …) recolours it and nothing else, each shade keeping its lightness, so one sprite gives every team (Palette variants).
- wires glow: only while the wireframe look is on. This material’s
wires take its brightest shade whatever the light, for holograms and
neon, and they are in the emission sheet (
--export emission), so an engine can bloom them — or show them alone, the wires on black.
Team colour by colour names the team colour by a colour instead: every ramp of that hue becomes it, whatever material draws it. That is the way on a model painted from one texture atlas, where one material draws the whole character. Under the list Pixor says how many shades the team colour has, and how many it leaves alone because another colour of the sprite uses them too.
A model file can set the first two itself, through a material’s outline
and cycle hints (custom properties on the material); the list then says so
instead of offering the toggle.
Lines
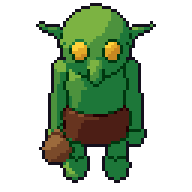
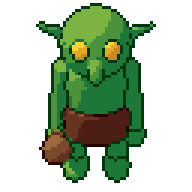
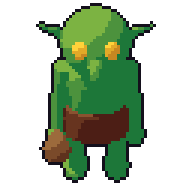
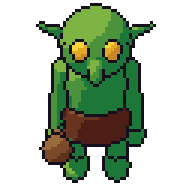
Each kind of line is None, Dark (the darkest shade) or Selout 1 to
Selout 3 (that many steps down the colour’s own ramp, so a red cape gets
a dark-red line). On the command line and in files Dark is dark and Selout 2 is
selout2.
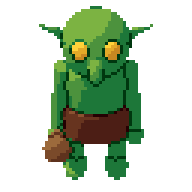
Silhouette, the outline around the whole sprite:
| none | dark (default) | selout 3 |
|---|---|---|
 |
 |
 |
Inner, where one part overlaps another:
| none | dark | selout 2 (default) |
|---|---|---|
 |
 |
 |
Creases, at sharp folds within one part:
| none (default) | selout 1 |
|---|---|
 |
 |
Convex edges, a light line on folds that bulge towards you, the only
line that goes up its ramp: None (the default), Highlight 1 to
Highlight 3, or Dark. It uses the crease angle below. On the command
line: --convex highlight1.
Lines are always 1 px wide, never form L-shaped corners, and never cross from one part to another.
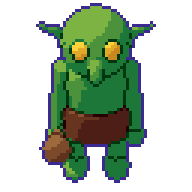
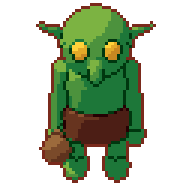
Dark line colour (automatic palettes only) sets the colour of lines set
to Dark (--line-colour #3b2a8f). Click it to open the colour picker, which also offers the
sprite’s own colours; right-click it to go back to the preset’s colour.
Selout lines keep their ramp colours, and fixed palettes always use their
darkest colour.
| #14101c (default) | #3b2a8f | #7a2a1c |
|---|---|---|
 |
 |
 |
Wireframe
The model’s own mesh edges, drawn as pixel lines on the palette: retro vector 3D, holograms and scanner effects, blueprints and UI. No rival tool draws wireframes on a palette. It is off unless you turn it on.
- Mesh edges is the wires’ colour, and turns the look on (None by default): Dark uses the line colour, Selout N the colour under the wire N steps down its own ramp, so a red part gets dark-red wires.
- Under them is the fill: The shading as usual, One flat colour over the whole silhouette (the vector and blueprint look; plain wires are drawn in the brightest shade there, since the flat colour is the dark one), or Nothing, which leaves the wires alone on transparency. With nothing under them the silhouette and inner lines go too, because they belong to a surface that is no longer drawn.
- Behind a surface decides what happens to the part of an edge that runs behind something: Not drawn (the default), 1 step darker, 2 steps darker, or Dotted.
- Every edge draws all of them. Off, only open edges and those sharper than the Edge angle (0° to 180°, 20° by default) are drawn, which hides the diagonals a glTF file puts across flat quads, so the model reads as the quads it was modelled with. Turn the angle down to draw more of the mesh, up to draw only the hard corners.
On the command line: --wire selout2 --wire-fill none --wire-hidden dotted --wire-angle 30 --wire-all-edges (Dark is --wire dark, 1 step
darker is --wire-hidden darker1), and the same names on pxr project set
(with --no-wire to turn it off). A material’s wires glow with
--wire-glow MATERIAL.
Line sensitivity
Where lines start. While you drag one of these, the viewport shows the edges stage: orange pixels are over the depth threshold, cyan over the crease angle, blue are between parts; dim ones are close.
- Crease angle (1° to 179°, 55° by default): how sharp a fold must be
to get a crease or convex line (lower draws more; creases must be on
under Lines).
--crease-angle. - Depth step (0.1 to 40 px, 2.5 by default): how far one surface must
stand in front of another to get an inner line (lower draws more).
--depth-step. - Shortest line (0 to 16 px, 3 by default): inner and crease lines
shorter than this are dropped; while you drag it, the lines stage
shows.
--shortest-line. - Lines between parts (on by default): lines where two parts touch
even without a depth step (off: only depth steps and creases).
--no-part-lines. - Silhouette inside (off by default): the silhouette on the sprite’s
own edge pixels instead of around them.
--outline-inside.
Shading
Band edge 1, 2… set where each light band starts, as N.L (-1 faces away from the light, 1 faces it); the bands stage shows the result while you drag. Smallest highlight (1 to 16 px, 2 by default) drops highlights smaller than that many pixels, and Band hold (0 to 0.3, 0.05 by default) keeps a pixel’s band across frames while it is that close to an edge, so bands don’t flicker.
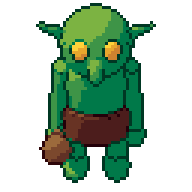
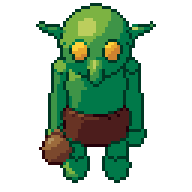
Specular adds a bright shade where the light reflects (metal, gems). Size sets how large the highlights are. Highlights smaller than Smallest highlight are dropped. It is off in every preset but selout. (Shown with the selout preset.)
| off | on |
|---|---|
 |
 |
Cleanup
Coverage is how much of a pixel the model must cover to be drawn, and Thin parts how much a thin part (a blade, a staff) needs to keep its pixel, each a fraction of the pixel (0.5 and 0.2 by default); the coverage stage shows both (dropped pixels in red).
Orphan size (0 to 4): stray clumps of up to that many pixels take the colour around them; 1, the default, cleans single pixels, 2 pairs too. 0 turns the cleanup off.
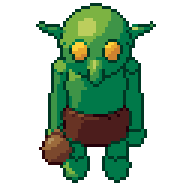
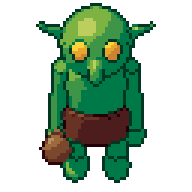
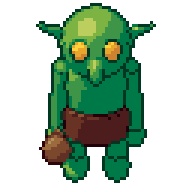
Anti-aliasing: softens line staircases the way pixel artists do, with
one darker pixel in the inner corner of each step. 1 applies it to the
silhouette, 2 to every line (--aa 1). (Shown with the selout preset.)
| 0 (default) | 1 | 2 |
|---|---|---|
 |
 |
 |
Even stairs: straight edges of the silhouette get even steps, the way
a pixel artist draws them — an isometric edge that came out 2, 3, 1, 2
pixels becomes 2, 2, 2, 2. Only runs of steps that average a whole number
of pixels are touched, curves are left alone, and no edge moves by more
than a pixel; the pixels it adds are the colour of the ones they grow from.
Off by default; --even-stairs on the command line.
Smear frames: in a clip, a pixel that moved this many pixels or more
since the frame before leaves a trail of its own colour back along the way
it came — the smear of a fast swing or a lunge, the way animators draw one.
It is drawn behind what moved, never over anything else, and a slow frame
has none. It goes up to 64 px; 0 (the default) turns it off, and 3 to 4
pixels suits a sprite of 64.
On the command line: --smear 3.
Export
Formats, layout, padding and extrusion: see Exporting to engines.
Judging the pixels
The 2D View in the Style step is where the pixels are actually judged, and its bar has the tools an Aseprite user reaches for:
| Tool | What it is for |
|---|---|
| Pixel grid (Shift+G) | a line around every pixel, from 4x up |
| Zoom (+, -, wheel, pinch) | about the pointer, smoothly; every pixel stays whole screen pixels. The middle button moves the sprite, Home fits it again |
| The readout (hover a pixel) | its palette index, its hex, which ramp it is on and how far along, whether it is fill, a line, dither or a soft edge, and the part and material it came from. The index is the one that matters: everything after shading works in palette indices |
| Colours (C) | every palette entry as a bar of how often this frame uses it, the ones it does not use greyed, and any two an eye cannot tell apart outlined. It is live, so a colour count is checked while the ramp is being chosen rather than in a report after the export |
| Onion skin (O) | the frame before (warm) and after (cool), for judging an arc |
| What changed (D) | the pixels that differ from the frame before, so a clip reads as motion rather than as a row of stills. A frame where nothing changed says so |
| A/B (A) | hold this render, change a ramp or a light, and press A to flick between the two in place. A small change is judged by flicking, not by remembering |
| Background | a checkerboard, a flat colour, or your own game art, so contrast is judged where the sprite will live |
| Consistency board: every side at once (B) | every side of this frame at once, with its width and height; Silhouettes draws each as its shape alone, Pivots marks where each stands, Colour counts counts each one’s colours |
| Checks | what every check found, marked on the pixels it means, and counted under the frame (off at first) |
What is on screen is what lands in the file: Pixor’s own tests compare the preview’s pixels with the exported sheet’s, byte for byte, at every zoom.
Shapes
Size, segments, place and colour of a shape built in the app: see The scene.
What this page describes is in the full version; the free browser demo keeps to the default look and the PNG sheet.
Try in browser Get Pixor