3D to pixel art: the complete guide
Games have rendered sprites from 3D models since the early nineties. This guide explains how to do it so the result reads as pixel art, not as a blurry render made small.


Drawing a character by hand in eight directions, with walk, run, attack and death cycles, is a lot of frames. For a small team it can be the single biggest art cost in a game. Rendering those frames from a 3D model is an old answer to that problem. This guide covers where the idea came from, why it works, what goes wrong, and how to get sprites that look like pixel art rather than a shrunken render.
A short history of pre-rendered sprites
In 1994 Rare released Donkey Kong Country on the Super Nintendo. Its characters and scenery were modelled and rendered on Silicon Graphics workstations, then reduced to the console’s small sprites and limited colours. It looked unlike anything else on the system, and it showed that a 3D pipeline could feed a 2D game.
Through the late nineties pre-rendered sprites became common on the PC. Diablo (1996), Fallout and Fallout 2, StarCraft and Age of Empires all used units and characters rendered from 3D, often in many directions, because a model can be turned for free while a drawing cannot.
The technique came back in a different form with Dead Cells (2018). Motion Twin animated its characters in 3D and rendered them as small pixel-art frames, and described the process in the 2018 Gamasutra (now Game Developer) article “Art Design Deep Dive: Using a 3D pipeline for 2D animation in Dead Cells”. The point was the same as in 1994: a small team getting smooth, consistent animation without drawing every frame.
You can read more in Pre-rendered sprites.
Why render from 3D
Three reasons come up again and again.
- Every direction. Once a model exists, a new side is just another camera. Four, eight or sixteen directions cost the same effort to set up.
- Consistent animation. The character’s proportions stay the same in every frame and every side. Hand-drawn sprites drift; a skeleton does not.
- Changes are cheap. Change the armour colour, the sprite size or the palette and render again. With hand-drawn sheets, a late change means repainting hundreds of frames.
The cost is that a plain render does not look like pixel art. Shrink a render with smooth shading and you get soft edges, muddy gradients, hundreds of near-identical colours and pixels that flicker from frame to frame. The rest of this guide is about closing that gap.
What makes it read as pixel art
Pixel art is less about low resolution and more about control. Every pixel is a decision. A render makes millions of tiny decisions you did not ask for, so the job is to take those decisions back.
One pixel scale
Everything in the game should share one size of pixel. If a tree is drawn at one scale and a character at twice the detail, the mismatch is obvious. Pixel artists call mixed pixel sizes mixels. In a 3D pipeline the fix is a single pixels-per-metre scale: a two-metre knight is always the same number of pixels tall, and a crate next to him is in proportion. In Pixor, set a fixed Pixels/m on the cameras for this reason: by default each camera fits its sprite to its own size.
A fixed pivot
If the character’s feet land on a different pixel each frame, the sprite jitters in game even when the animation is good. The pivot, usually between the feet, should sit on the same pixel in every frame and every side. Pixor locks the pivot to one pixel across all frames and sides.
Limited palettes and ramps
Hand-made sprites use few colours, arranged in ramps: a short run from dark to light for each material. Few colours make shapes read clearly at small sizes. A render needs to be reduced to a palette, not just to fewer colours chosen at random.
Hue shifting
Good ramps do not only get darker; they change hue as they go, usually cooler in shadow and warmer in light. This is hue shifting, and it is much of what makes pixel art look painted rather than greyed out.
Selective outlines and clean lines
A black line around everything is fine for some styles, but many artists colour the outline from the shape it surrounds, darker on the shadow side and lighter or missing on the lit side. That is selout. Lines should be one pixel wide with no doubled “L” corners, and thin parts like sword blades and staffs should stay as clean one-pixel lines rather than breaking up. More in Outlines.
No stray pixels and no flicker
Lone pixels that do not belong to any shape look like noise. In animation, the worse problem is flicker: a pixel or a line that appears for one frame and vanishes the next. A render produces both all the time, because tiny changes in the model push values just over or under a threshold.
No dithering by accident
Dithering can be a deliberate style. If it is used, the pattern should stay fixed to the surface as the model moves, not crawl across it like a screen door.
The pipeline, step by step
Here is the usual chain, and where Pixor fits in each step.
1. The model
Any rigged or static model will do. Pixor reads glTF and GLB, FBX (including Mixamo downloads), OBJ and MagicaVoxel .vox files. Simpler models with clear shapes and distinct materials make better sprites than very detailed ones; detail smaller than a pixel will be lost anyway.
2. A camera per side
Each direction is a camera looking at the model. Side-scrollers need one; top-down and isometric games use rings of 4 or 8. Pitch matters as much as direction: a side view, a three-quarter view, a 2:1 isometric view and a top-down view all suit different games. In Pixor every side is a camera, in rings of 4, 8 or 16 or at any angle you choose.
3. The G-buffer
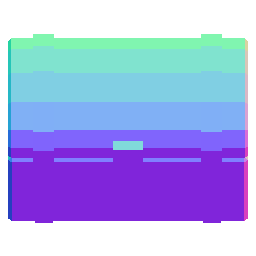
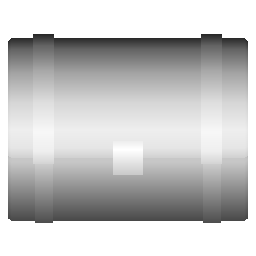
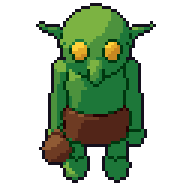
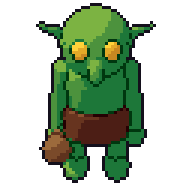
Instead of rendering a finished image straight away, render the information you need: the flat colour of each pixel, the direction its surface faces (normals), its distance from the camera (depth) and which part or material it belongs to. This is called a G-buffer. Every later step works from it, which is what makes the rest controllable. The pictures at the top of this page show a chest’s colour, normals and depth, and the finished sprite.
4. Light in bands
Smooth shading becomes a few flat bands: light, mid, shadow. Pixel art typically uses two to four. The hard part is keeping bands stable when the model moves, so a band edge does not jump back and forth on a surface that has barely turned. Pixor shades in 1 to 4 bands and holds a band until the surface has clearly turned.
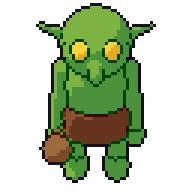
5. Lines
From depth, normals and part ids you can find the silhouette, the inner edges between parts, and creases where a surface folds. Each can be drawn differently: dark, coloured, or not at all. Pixor treats silhouette, inner and crease lines as separate kinds, each with its own selective-outline setting, draws them one pixel wide without L-corners, and keeps thin parts as one-pixel lines.
6. Palette
Each band of each material is mapped to a colour in a ramp. You can let the tool build ramps from the model’s colours or force a fixed palette shared by the whole game. Pixor builds hue-shifted ramps per material, and can use an automatic palette, one of seven built in, a Lospec .hex or GIMP .gpl file, or a palette taken from a picture. It writes indexed PNGs and has console modes for Game Boy, NES, PICO-8, TIC-80 and C64 colour limits.
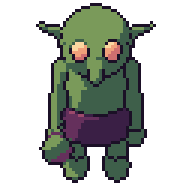
7. Clean-up
The last pass removes stray single pixels and lines that appear for only one frame. This is the difference between a sheet that looks hand-made and one that looks like video. Pixor runs this clean-up as its own stage.
8. The sheet
Frames are packed into a sheet, usually one row per action and side, with data that tells the engine where each frame is.
In Pixor each of these stages is a node in the Style graph, so you can see and change any of them. A look you like can be saved as a kit and reused across a project. The built-in presets (clean, selout, retro4, flat and wireframe) are starting points.

Choosing sizes and directions
Size is a design choice first. A smaller sprite is easier to read in a crowd and cheaper to touch up; a larger one shows more personality. As a rough guide:
- 16 px suits tiles, items and very small characters.
- 32 px is a common character height for top-down and platformer games.
- 48 to 64 px gives room for faces, gear and expressive animation.
Pick a pixels-per-metre scale that gives your main character the height you want, then let everything else follow. Display the game at whole-number multiples (2×, 3×, 4×) so each art pixel becomes a clean square on screen. Sprite sizes goes into this in more detail.
For directions: one side for side-scrollers (flip it for the other way), four for simple top-down games, eight for most action and strategy games, sixteen for things that turn smoothly, like vehicles.
Animation
A 3D animation has a pose for every instant. Pixel-art animation has a handful of frames, and the frames are chosen, not sampled evenly.
Pose extremes and holds
The frames that matter most are the extremes: the contact pose of a walk, the top of a jump, the moment a sword hits. Good sprite animation keeps those and holds them a little longer, and drops the in-betweens that add nothing at small sizes. Evenly spaced frames tend to look floaty. Pixor’s smart frames pick pose extremes and hold them.
Fewer frames, cleaner frames
A six or eight frame walk is plenty at 32 pixels. More frames mean more chances for flicker and more work to touch up. Pixor measures flicker across an animation.
Getting animation
You can animate the model yourself, use clips that came with it (or in separate clip files), or retarget clips from another rig. Pixor also has a motion library of simple actions (idle, walk, run, jump, attack, hit, death) and object motions (spin, bob, swing, pulse) for props and pickups.
Touching up by hand
A render gives you consistent frames. It does not give you an artist’s judgement. Most good results come from rendering a clean base and then fixing the frames that matter: a clearer face, a stronger silhouette on the attack frame, a highlight on the blade.
Aseprite is the usual tool for this. Pixor exports .aseprite files with a tag for each action and side. When you change the model or settings and render again, the hand-painted layers stay on their frames, so touch-ups are not thrown away by a re-bake. See Aseprite.
Exporting to engines
Engines want frames plus metadata. Common targets:
- Sprite sheets as PNG with a JSON file listing frames, actions and sides.
- Godot SpriteFrames for Godot projects.
- GIF or APNG for previews, store pages and social posts.
- Normal and depth maps if your engine lights 2D sprites.
Pixor exports all of these. Because rendering is deterministic, the same model and settings always give the same pixels, so sheets can be rebuilt at any time without surprises. See Exports and the export manual.
Try it
Pixor is a desktop app for Windows and Linux that does each step above, offline and with no account. It contains no generative AI: it renders your model with the settings you choose. It costs $19.99 once, with every update free. Start with How it works, look through the library for sprites rendered this way, or read the manual to see every setting.
Questions
Can a 3D render really look like hand-made pixel art?
It can come close if you control scale, palette, light bands, lines and stray pixels. Most artists still touch up key frames by hand; the render gives a clean, consistent base to start from.
What size should my sprites be?
Pick one pixels-per-metre scale for the whole game. Characters of 32 to 64 pixels tall are common; small tiles are often 16 or 32 pixels.
How many directions do I need?
Side-scrollers need one side (mirrored). Top-down and isometric games usually use 4 or 8; 16 gives smooth turning for vehicles and ships.
Does Pixor use generative AI?
No. Pixor contains no generative AI. The same model and settings always give the same pixels.